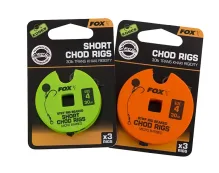
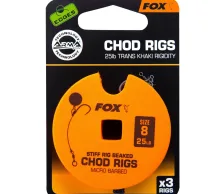
Materials Needed
- Fox Edges Chod Filament - For the stiff hook section.
- Fox Edges Choddy Hooks - Size 4 or 6, depending on bait size and target fish.
- Fox Edges Rig Ring - To attach the hookbait.
- Fox Edges Kwik Change Swivel - For easy attachment to the mainline.
- Fox Edges Tungsten Putty - To balance the buoyancy of the rig.
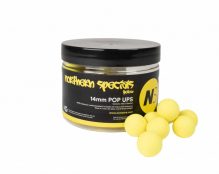
- CC Moore Pop-Up Baits - Your choice of flavour and size.
- Fox Edges Bait Floss - To secure the bait.
- Tools - Scissors, lighter, and Pulla Tools for tightening knots.
Step-by-Step Instructions
1. Cutting and Preparing the Filament
- Begin by cutting about 8 inches of Fox Edges Chod Filament. Use a lighter to gently taper one end, making threading easier.
2. Tying the Hook
- Thread the tapered end of the filament through the back of the hook eye. Whip the filament around the shank of the hook six times, then pass the filament back through the eye. This creates a secure knot. Trim the excess filament, leaving a small tag end. Melt this end with a lighter to form a small, secure blob that prevents the knot from slipping.
3. Attaching the Rig Ring
- Slide a Fox Edges Rig Ring onto the filament. This ring is essential for attaching the bait. Thread the filament back through the hook eye, forming a 'D' shape with the filament. Secure the 'D' by melting the end of the filament and pressing it flat with the lighter, creating a blob that keeps the ring in place.
4. Securing the Kwik Change Swivel
- Attach the hook section to a Fox Edges Kwik Change Swivel by threading the filament through the smaller eye of the swivel. Form a loop and secure it with a 2-turn Blood Knot. Use Pulla Tools to tighten the knot firmly, then trim the excess filament. Again, melt the end to form a blob for extra security.
5. Forming the Curve
- The Chod Rig’s effectiveness comes from its curved shape, which allows for better bait presentation. Gently bend the filament into a curve by running your fingers along it. The curve should be subtle, just enough to present the bait naturally above any underwater obstacles like weed or silt.
6. Mounting the Hookbait
- Use Fox Edges Bait Floss to attach your chosen CC Moore Pop-Up bait to the Rig Ring. Cut a length of floss and thread it through the ring and the bait. Tie the floss securely, then trim the excess, leaving a small tag. Melt the tag with a lighter to create a blob that secures the bait in place.
7. Balancing with Tungsten Putty
- Mould a small piece of Fox Edges Tungsten Putty around the knot area on the filament. The putty helps to counterbalance the buoyancy of the pop-up bait, ensuring the hook points down and sits correctly on the lake bed. Adjust the amount of putty to achieve the desired sinking rate, ensuring the bait sits just above any weed or debris.
Additional Tips
- Choosing the Right Hook Size: A Size 4 hook is ideal for larger baits or wary carp, while a Size 6 hook works well for smaller pop-ups or when targeting more cautious fish.
- Tuning Buoyancy: Always test the rig in water before use to ensure the pop-up is balanced correctly. Add or remove putty as needed.
- Rig Length: The length of the Chod Rig can be adjusted depending on the fishing conditions. In very weedy areas, a longer rig might be more effective.
Conclusion
The Chod Rig, when tied correctly with quality components like those from Fox International and CC Moore, is a highly effective setup for carp fishing, especially in challenging conditions. Its unique presentation keeps the bait visible and accessible to the fish, increasing your chances of a successful catch.

