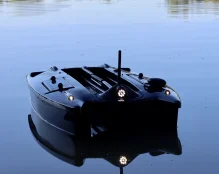
How to Install Carp Pilot Pro into a Bait Boat
Installing Carp Pilot Pro into your bait boat involves several intricate steps. This detailed guide will cover everything from gathering the necessary parts to configuring the software for optimal performance. With a step-by-step approach, you'll be able to transform your bait boat into a high-tech fishing assistant.
Table of Contents
- Introduction to Carp Pilot Pro
- Required Parts and Tools
- Preparing Your Bait Boat
- Installing the Carp Pilot Pro System
- Connecting the Hardware
- Configuring the Software
- Testing and Troubleshooting
- Advanced Features and Premium Options
- Maintenance and Best Practices
- Conclusion
1. Introduction to Carp Pilot Pro
Carp Pilot Pro is an advanced app designed to optimize the use of bait boats in fishing. It integrates with Ardupilot systems, NMEA0183 fish finders, and WiFi GPS modules to offer features such as waypoint management, depth mapping, and automated bait delivery. This app simplifies the fishing process by providing an intuitive interface and powerful functionalities.
2. Required Parts and Tools
Parts List:
- Ardupilot-Compatible Controller: Pixhawk or similar flight controller for precise navigation and control.
- GPS Module: Essential for accurate positioning and navigation (e.g., Ublox Neo-M8N).
- Telemetry Module: Allows for communication between the bait boat and your device (e.g., 3DR Radio Telemetry Kit).
- NMEA0183 Fish Finder: For depth measurement and fish detection (e.g., Deeper Pro+2.0, Lowrance Elite Ti).
- WiFi Module: Facilitates remote control and data transmission (e.g., ESP8266).
- Battery and Power Distribution Board: Supplies power to all components.
- Motors and ESCs (Electronic Speed Controllers): For propulsion and steering.
- Servo Motors: To control bait release mechanisms and other movable parts.
Tools:
- Soldering Iron and Solder: For secure electrical connections.
- Screwdrivers and Hand Tools: Necessary for assembling and mounting components.
- Heat Shrink Tubing and Electrical Tape: For insulating connections.
- Wire Strippers and Cutters: To prepare wires for connections.
- Multimeter: For testing electrical connections and ensuring correct wiring.
3. Preparing Your Bait Boat
Initial Setup:
- Clean and Dry: Ensure the boat is clean and free from moisture.
- Mounting Locations: Identify suitable locations for all components, keeping in mind accessibility and balance.
Modifications:
- Hull Modifications: If necessary, make modifications to the hull or internal compartments to accommodate new parts.
- Secure Mounts: Use durable mounts to secure components, minimizing the risk of vibration-related issues.
4. Installing the Carp Pilot Pro System
Mounting the Controller:
- Secure Installation: Place the Pixhawk or compatible controller in a stable, central location within the boat.
- Anti-Vibration Mounts: Use these mounts to reduce interference and improve accuracy.
GPS and Telemetry Modules:
- Optimal Placement: Mount the GPS module on the top of the boat for an unobstructed view of the sky.
- Telemetry Module: Install this module in a location where it won't be obstructed by other electronics or boat structures.
5. Connecting the Hardware
Wiring:
- GPS Module: Connect to the flight controller using the appropriate cables and connectors.
- Telemetry Module: Wire to the flight controller for seamless data transmission.
- Motors and ESCs: Ensure correct channel assignments and secure all connections.
- Battery and Power Distribution Board: Connect all power lines, ensuring secure and insulated connections.
Fish Finder and WiFi Module:
- Fish Finder Installation: Follow the manufacturer's instructions for optimal installation.
- WiFi Module: Connect to the flight controller to enable remote operations and data streaming.
6. Configuring the Software
Installing Carp Pilot Pro:
- Download and Install: Install the Carp Pilot Pro app from your preferred app store on your device.
- Connect to Bait Boat: Use USB, Bluetooth, TCP, or UDP to connect the app to your bait boat.
Basic Configuration:
- Firmware Setup: Configure the controller firmware to ArduRover, ensuring compatibility with Carp Pilot Pro.
- Communication Protocol: For ArduPilot 4.2 or higher, set the protocol to Mavlink 1 by changing the SERIAL1_PROTOCOL parameter to 1.
Setting Waypoints and Routes:
- Waypoint Management: Use the app to set waypoints and plan routes, ensuring precise navigation.
- Servo Configuration: Adjust settings for bait release mechanisms and other servos.
7. Testing and Troubleshooting
Initial Tests:
- Power On: Power on the bait boat and check all connections.
- Motor Functions: Test motor functions and telemetry connection to ensure everything is working correctly.
Troubleshooting Common Issues:
- Connection Issues: Ensure GPS and telemetry modules are correctly connected and configured.
- Software Updates: Check for the latest software updates and ensure firmware compatibility.
8. Advanced Features and Premium Options
Premium Subscription Benefits:
- Live Mapping and Bathymetric Editor: Create and use depth maps in real-time.
- Mock GPS: Utilize the boat's GPS for improved mapping accuracy.
- WiFi Echo Sounder Integration: Access real-time depth measurements and create detailed bathymetric maps.
9. Maintenance and Best Practices
Regular Checks:
- Inspect Connections: Regularly check all connections and mounts for security.
- Software and Firmware Updates: Keep all software and firmware up to date.
Storage and Handling:
- Dry Storage: Store the bait boat and components in a dry, safe place.
- Careful Handling: Handle electronic components with care to avoid damage.
10. Conclusion
Installing Carp Pilot Pro in your bait boat significantly enhances its capabilities, providing precise control and automation. By following these detailed steps and ensuring careful installation, you can achieve optimal performance and enjoy a more efficient fishing experience.
For more detailed instructions and community support, visit the Carp Pilot Pro website, their Facebook group, and the Carp Pilot Pro YouTube Channel.
Sources
- Carp Pilot Pro Official Website
- Carp Pilot Pro YouTube Channel
- Carp Pilot Pro Facebook Group
- Spydertech
This comprehensive guide provides detailed steps and considerations for installing Carp Pilot Pro into a bait boat. Following these instructions will help ensure a successful installation and allow you to take full advantage of the advanced features offered by Carp Pilot Pro.


